Recent Posts
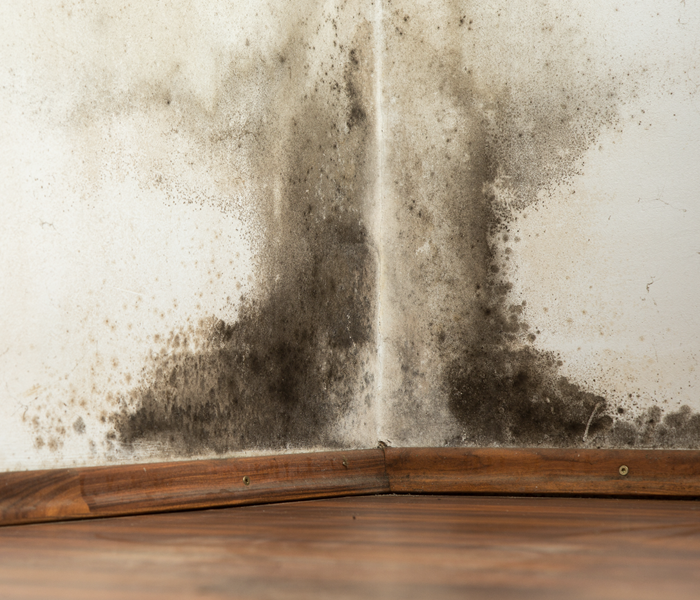
Mold vs. Mildew: What's the Difference?
7/11/2024 (Permalink)
In indoor environments, the terms "mold" and "mildew" are often used interchangeably to describe fungal growth on surfaces. While both mold and mildew are types of fungi that thrive in damp and humid conditions, they have distinct characteristics and growth patterns. Understanding the differences between mold and mildew can help homeowners and property owners identify and address fungal growth effectively. In this blog, we'll explore the key differences between mold and mildew and discuss how to differentiate between the two.
What is Mold?
Mold is a type of fungus that grows in multicellular filaments known as hyphae. It typically appears as fuzzy or powdery patches of green, black, blue, or gray on surfaces such as walls, ceilings, and building materials. Mold thrives in damp, dark, and poorly ventilated environments and can spread rapidly if not addressed promptly. Common indoor mold species include Aspergillus, Penicillium, Cladosporium, and Stachybotrys chartarum (black mold).
What is Mildew?
Mildew is a type of fungus that grows in flat, powdery patches on surfaces such as walls, fabrics, and plant leaves. Unlike mold, mildew typically remains on the surface of materials and does not penetrate deeply. Mildew is often white or gray in color and may appear as a thin film or powdery residue. It thrives in warm, humid, and poorly ventilated environments and is commonly found in bathrooms, kitchens, and other moisture-prone areas.
Key Differences Between Mold and Mildew
- Appearance: Mold typically appears as fuzzy or velvety patches of various colors, including green, black, blue, or gray. Mildew, on the other hand, appears as flat, powdery patches that are usually white or gray in color.
- Texture: Mold has a fuzzy or velvety texture due to the presence of multicellular filaments known as hyphae. Mildew has a powdery or fluffy texture and tends to remain on the surface of materials.
- Depth of Growth: Mold can penetrate deeply into porous materials such as drywall, wood, and fabric, making it more difficult to remove. Mildew typically remains on the surface of materials and does not penetrate deeply.
- Environmental Conditions: Mold thrives in damp, dark, and poorly ventilated environments with high humidity levels. Mildew prefers warm, humid, and poorly ventilated conditions but can also develop on surfaces exposed to moisture.
How to Differentiate Between Mold and Mildew
- Color: Mold is typically green, black, blue, or gray in color, while mildew is usually white or gray.
- Texture: Mold has a fuzzy or velvety texture, while mildew has a powdery or fluffy texture.
- Depth of Growth: Mold tends to penetrate deeply into porous materials, while mildew remains on the surface.
- Location: Mold is commonly found on walls, ceilings, and building materials, while mildew is often found on surfaces such as fabrics, plant leaves, and bathroom tiles.
While mold and mildew are both types of fungi that thrive in damp and humid conditions, they have distinct characteristics and growth patterns. By understanding the differences between mold and mildew, homeowners and property owners can identify and address fungal growth effectively, maintaining a healthy indoor environment for occupants. SERVPRO® is just a phone call away when you need expert assistance in mold removal, remediation, and restoring your home from mold damage.
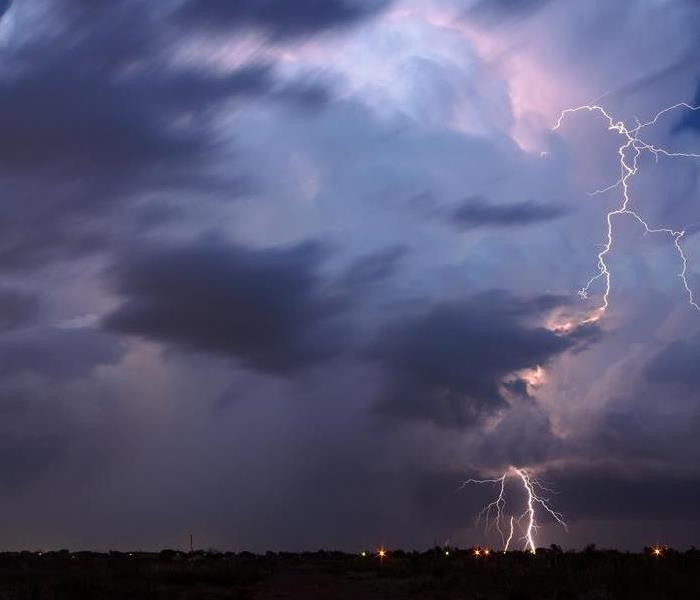
Protecting Your Home Against Flash Floods and Sudden Storms
6/25/2024 (Permalink)
As the saying goes, "Prepare for the worst, hope for the best." When it comes to safeguarding your home against flash floods and sudden storms, this adage couldn't be more relevant. At SERVPRO®, we understand the devastation that these natural disasters can bring, which is why we're here to provide you with essential tips to fortify your home and protect your loved ones.
- Stay Informed: Knowledge is power. Stay updated with weather forecasts and warnings in your area. Utilize weather apps, listen to local news, and heed evacuation orders if necessary.
- Maintain Gutters and Drains: Clear gutters, downspouts, and drains regularly to ensure proper drainage. Clogged gutters can lead to water pooling around your home, increasing the risk of flooding.
- Inspect Your Foundation: A solid foundation is crucial for withstanding floodwaters. Regularly inspect your foundation for cracks or weaknesses, and promptly address any issues to prevent water seepage.
- Elevate Utilities: Elevate electrical panels, HVAC systems, water heaters, and other utilities above potential flood levels. This simple step can mitigate damage and reduce the risk of electrical hazards during floods.
- Seal Gaps and Cracks: Seal any gaps or cracks in your home's exterior to prevent water infiltration. Pay close attention to areas around windows, doors, and vents.
- Install Sump Pumps: Consider installing a sump pump in your basement or crawlspace to remove excess water during heavy rains or flooding. Test your sump pump regularly to ensure it's in proper working condition.
- Invest in Flood Barriers: Deploy flood barriers or sandbags around vulnerable entry points, such as doors and windows, to create a barrier against rising water levels.
- Backup Power Source: In the event of a power outage, having a backup power source such as a generator can keep essential systems running, including sump pumps and security alarms.
- Create a Family Emergency Plan: Develop a comprehensive emergency plan with your family. Establish evacuation routes, designate meeting points, and ensure everyone knows how to safely shut off utilities if needed.
- Protect Important Documents and Valuables: Store important documents, irreplaceable items, and valuables in waterproof containers or safes. Consider digitizing important documents for added protection.
- Review Insurance Coverage: Review your homeowners insurance policy to ensure you have adequate coverage for flood damage. Consider purchasing additional flood insurance if you live in a high-risk area.
- Post-Storm Inspection: After a storm or flood event, inspect your home for any damage. Address issues promptly to prevent further damage and mold growth.
By implementing these proactive measures, you can significantly reduce the risk of damage to your home and belongings during flash floods and sudden storms. Remember, preparedness is key to weathering the storm safely. At SERVPRO, we're here to support you every step of the way. Stay safe and stay prepared!
For professional flood damage restoration and cleanup services, contact SERVPRO today. We're here to help you recover and restore your home to its preloss condition.
Why smoke detectors are essential for home safety
4/19/2024 (Permalink)
 A SERVPRO technician working on fire damage restoration.
As your trusted partner in home restoration and safety, we understand the paramount importance of proactive measures to protect your home and loved ones. In this blog post, we shed light on a fundamental yet often overlooked aspect of home safety – smoke detectors.
Why Are Smoke Detectors Essential?
Fire incidents can be catastrophic, causing irreparable damage to property and, more importantly, posing serious risks to life. A smoke detector serves as an invaluable early warning system, offering you precious moments to evacuate safely in the event of a fire. Here's why every home should be equipped with this essential device:
1. Early Detection Saves Lives
Smoke detectors are designed to identify the presence of smoke, signaling a potential fire hazard even before flames are visible. Early detection enables residents to take swift action, significantly reducing the risk of injuries or fatalities.
2. Rapid Emergency Response
Time is of the essence during a fire emergency. A smoke detector not only alerts occupants but also triggers emergency services, allowing them to respond promptly. This rapid response can make a crucial difference in minimizing damage and saving lives.
3. Protection During Sleep
Fires can occur at any time, including when we are most vulnerable – while sleeping. Smoke detectors, strategically placed in bedrooms and hallways, ensure that you are awakened promptly in case of a fire, enhancing your chances of a safe escape.
4. Comprehensive Coverage
Modern smoke detectors come with advanced features such as interconnected systems, ensuring that if one alarm is triggered, all alarms in the house will sound. This comprehensive coverage ensures that every member of your household is alerted simultaneously, regardless of their location.
5. Affordable and Easy to Install
Investing in home safety doesn't have to break the bank. Smoke detectors are affordable, easy to install, and require minimal maintenance. Regular testing and battery replacement are simple tasks that can be incorporated into your routine to ensure the continued effectiveness of these life-saving devices.
6. Peace of Mind
Knowing that your home is equipped with smoke detectors provides a sense of security and peace of mind. It's a proactive step towards safeguarding your property and the well-being of your family.
Prioritizing the installation of smoke detectors is a small yet significant investment in home safety. At SERVPRO, we believe in a holistic approach to protecting your home. From restoration services to preventative measures like smoke detectors, we're here to ensure that your home remains a safe haven. Stay tuned for more tips and insights on home safety, brought to you by your SERVPRO family.
Unveiling Mold's Blueprint: The Science Behind Growth and Spores
3/10/2024 (Permalink)
Mold, an ancient and resilient organism, follows a distinct set of principles when it comes to growth and reproduction. In this blog, we will delve into the science behind mold, exploring the ideal conditions for its growth and the remarkable role of spores.
The Mold Life Cycle
Mold undergoes a lifecycle that encompasses various stages, from spore germination to the development of mature colonies. Understanding this lifecycle sheds light on the conditions mold requires to thrive.
Mold thrives in environments that offer three key elements: moisture, a food source, and favorable temperatures. These conditions create a habitat conducive to mold colonization.
Moisture
Moisture is a fundamental requirement for mold growth. Whether derived from leaks, high humidity, or damp materials, mold utilizes water as a catalyst for germination and sustained development.
Mold relies on organic materials as a food source. Common materials like wood, drywall, fabrics, and paper provide the nutrients mold needs to grow and reproduce.
Temperature Range
Mold exhibits versatility in its temperature preferences. While some molds thrive in warmer conditions, others can endure and proliferate in cooler environments. The range generally falls between 40°F and 100°F (4°C to 38°C).
Mold spores are microscopic structures responsible for mold reproduction. These tiny, lightweight spores serve as nature's silent carriers, facilitating the spread and survival of mold.
Reproduction through Spores
Mold reproduces by releasing spores into the environment. These spores can remain dormant for extended periods until they encounter conditions suitable for germination. Once activated, they initiate the growth of new mold colonies.
Mold spores are adept at airborne dispersal. They can travel through the air over long distances, hitching rides on air currents, ventilation systems, or even clothing. This mobility allows mold to colonize new areas efficiently.
Environmental Resilience
Mold spores demonstrate remarkable resilience to environmental conditions. They can withstand harsh temperatures, low humidity, and other adversities, ensuring their survival until they find a suitable environment for germination.
When mold spores encounter the ideal conditions of moisture, a food source, and appropriate temperatures, they germinate and develop into mature colonies. These colonies, if unchecked, can lead to visible signs of mold growth on surfaces.
Preventing Mold
Moisture Control
Implement effective moisture control strategies, including prompt repairs of leaks and adequate ventilation, to deter the conditions favorable for mold growth.
Regular Inspections
Conduct routine inspections of susceptible areas in your home, such as basements, crawl spaces, and attics, to identify and address potential moisture sources.
Humidity Management
Maintain optimal indoor humidity levels through the use of dehumidifiers, ventilation, and proper insulation to discourage mold colonization.
Swift Remediation
If mold is detected, take swift remediation measures to address the root cause, remove affected materials, and prevent further growth.
Understanding the science behind mold growth and spores unveils the intricate mechanisms that guide this resilient organism. By comprehending the conditions that mold requires for proliferation, individuals can proactively implement measures to create an environment less conducive to its establishment. Through effective moisture control, regular inspections, and swift remediation, homeowners can navigate the complexities of mold's existence and maintain a healthier living space. SERVPRO® is just a phone call away when you need expert assistance in mold removal, remediation, and restoring your home from mold damage.
Overcoming Water Damage: Restoring Personal Items with Sentimental Value
2/4/2024 (Permalink)
Water damage can be a devastating event, particularly when it impacts personal items that hold sentimental value. From family heirlooms to treasured photographs, restoring water-damaged items with sentimental value requires careful attention to detail and effective restoration techniques. In this blog post, we will explore restoration strategies for water-damaged items with sentimental value.
Assessing the Damage
Discuss the importance of assessing the damage caused by water to personal items. Explain how water can affect different materials, including paper, fabric, and metal. Provide guidance on identifying common signs of water damage, including discoloration, warping, and mold growth.
Quick Action
Highlight the importance of acting quickly to minimize further damage to the water-damaged items. Emphasize that prompt action can help prevent mold growth and limit the extent of the damage.
Cleaning and Drying Process
Detail the crucial steps involved in cleaning and drying water-damaged items. Highlight the significance of removing the item from the wet environment, gently blotting excess moisture, and allowing proper air circulation to aid the drying process. Discuss the use of moisture-absorbing materials, dehumidifiers, and controlled environments to expedite the drying process while minimizing further damage.
Surface Cleaning and Restoration
Provide guidance on surface cleaning and restoration techniques tailored to different materials. Discuss gentle cleaning methods using appropriate solvents, brushes, and cotton swabs to remove dirt, stains, and discoloration caused by water damage. Highlight the importance of patience and caution while cleaning delicate or aged items.
Repair and Restoration of Damaged Areas
Explore techniques for repairing and restoring water-damaged sentimental items. Discuss methods such as consolidating, polishing, and reweaving to correct warping, buckling, or curling. Advising readers on seeking professional assistance for complex repairs ensures that delicate or valuable items are handled with the necessary expertise and care.
Preservation for the Future
Advise readers on preventive measures to safeguard sentimental items from future water damage. Suggest protective framing, controlled environments, and regular inspections to detect signs of moisture or mold early. Emphasize the significance of insurance coverage for these items to provide financial protection in case of unforeseen water damage events.
Restoring personal items with sentimental value after water damage is possible with prompt action, careful assessment, and effective restoration techniques. By understanding the cleaning, restoration, repair, and preservation processes, those who have experienced water damage to their personal items can restore them while preserving their emotional value.
The Aftermath of Storm Flood Damage: Navigating the Path to Recovery
1/3/2024 (Permalink)
Storms and flooding can wreak havoc on homes and communities, leaving behind a trail of destruction and a long road to recovery. The aftermath of storm flood damage can be overwhelming, both emotionally and physically. Understanding the steps to take in the aftermath of a flood is crucial for homeowners to navigate the path to recovery effectively. In this blog, we will explore the key considerations and steps to take when dealing with the aftermath of storm flood damage.
Ensure Safety
First and foremost, prioritize your safety and the safety of your family. Before entering your home after a flood, wait for authorities to deem it safe. Be cautious of electrical hazards, structural damage, and contaminated water in your property.
Document the Damage
- Take photos and videos of the flood damage to your property, both inside and outside.
- This documentation will be essential for insurance claims and assistance applications.
Contact Your Insurance Provider
- Notify your insurance provider about the flood damage as soon as possible.
- Understand your policy coverage details and file a claim promptly.
- Provide the documentation you gathered as evidence of the damage.
Begin the Cleanup Process
- Remove any standing water from your property using pumps or wet-vacs.
- Use fans and dehumidifiers to dry out the affected areas as quickly as possible.
- Remove damaged furniture, carpets, and other belongings to prevent further mold growth.
Engage Professional Help
Consider hiring a professional restoration company with experience in flood damage cleanup. These professionals have the expertise, equipment, and knowledge to thoroughly restore your property. Mold can start to grow within 24-48 hours after a flood. Thoroughly clean and disinfect surfaces and employ proper drying techniques to prevent mold growth. Consider using mold inhibitors or hiring a mold remediation specialist if necessary. Stay updated with local authorities regarding disaster assistance programs and resources available. Check if you qualify for any government assistance programs to aid in your recovery.
Take Steps to Prevent Future Flood Damage
Implement flood-resistant modifications to your property, such as elevating electrical outlets and appliances, installing flood-resistant barriers, or redirecting water flow away from your home.
Consider purchasing flood insurance if you live in an area prone to flooding. The aftermath of storm flood damage can be emotionally challenging. Seek support from family, friends, or professional counselors to help cope with the emotional toll.
Dealing with the aftermath of storm flood damage requires patience, resilience, and practical steps towards recovery. Prioritize your safety, document the damage, contact your insurance provider, and engage professional help for a thorough cleanup. Mitigate mold growth, address electrical and HVAC systems, and explore available disaster assistance programs. Take proactive measures to prevent future flood damage and seek emotional support during this challenging time. With a comprehensive and organized approach, homeowners can navigate the path to recovery and restore their homes to their former glory.
A Guide to Different Types of Fire Extinguishers and Their Usage
12/19/2023 (Permalink)
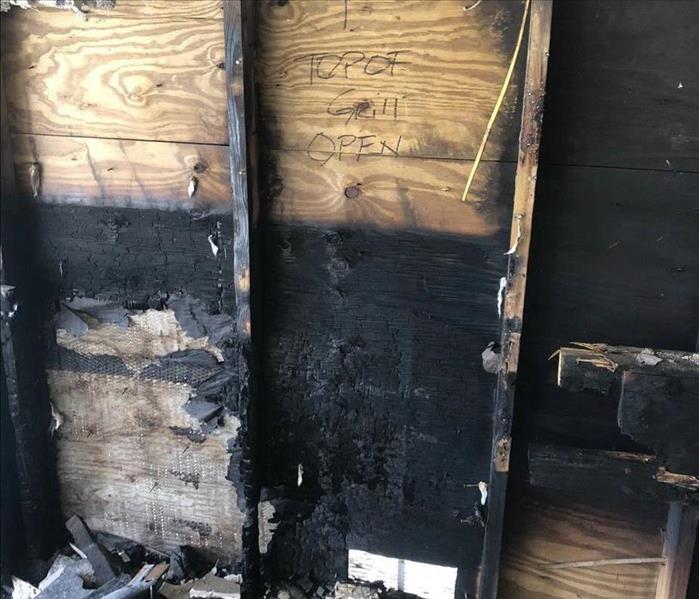 Fire safety is a critical aspect of protecting ourselves and our property.
When it comes to fire safety, having the right fire extinguisher and knowing how to use it can potentially make a life-saving difference. In this blog, we will dive into the various types of fire extinguishers available and provide essential information on their purpose, appropriate usage, and the different types of fires they can effectively combat. By understanding these key elements, you will be better equipped to protect yourself, your loved ones, and your property in the event of a fire emergency.
Class A Fire Extinguishers
Suitable for fires involving ordinary combustible materials such as wood, cloth, paper, and plastics.
How to use: Aim the nozzle at the base of the fire, sweep from side to side, and maintain distance to prevent the flames from reigniting.
Class B Fire Extinguishers
Designed for fires fueled by flammable liquids like gasoline, oil, paints, and solvents.
How to use: Aim at the base of the flames, squeeze the handle, and sweep the nozzle from side to side until the fire is extinguished.
Class C Fire Extinguishers
Intended for fires caused by energized electrical equipment such as appliances, wiring, and circuit breakers.
How to use: Similar to Class B extinguishers, aim at the base of the fire and sweep back and forth until the flames are out.
Class D Fire Extinguishers
Specifically designed for fires involving combustible metals like magnesium, titanium, and potassium.
How to use: These extinguishers are typically used by trained professionals and should not be handled by untrained individuals. Contact emergency services and let them handle Class D fires.
Class K Fire Extinguishers
Primarily used in commercial kitchens to combat fires fueled by cooking oils, greases, and fats.
How to use: Aim the nozzle towards the base of the fire, and in a controlled manner, sweep back and forth until the flames are extinguished. Do not use water or standard extinguishers on kitchen fires.
Water Mist Fire Extinguishers
Versatile extinguishers are suitable for Class A, B, and C fires, as well as fires involving electrical equipment.
How to use: Squeeze the handle and spray the water mist at the base of the flames, moving the nozzle from side to side until the fire is fully suppressed.
Carbon Dioxide (CO2) Fire Extinguishers
Effective for Class B and Class C fires, as well as fires involving electrical equipment.
How to use: Aim at the base of the fire, gently sweep back and forth to suffocate the flames and be cautious of the extremely cold discharge.
Fire safety is a critical aspect of protecting ourselves and our property. Understanding the different types of fire extinguishers and their appropriate usage is essential for effective fire prevention and response. Remember to identify the type of fire correctly and select the appropriate fire extinguisher for that specific class. Regularly inspect your extinguishers, train yourself and your family on how to use them, and always prioritize personal safety when dealing with fires. By being well-informed and prepared, you can play a crucial role in minimizing the impact of a fire emergency and safeguarding the well-being of those around you.
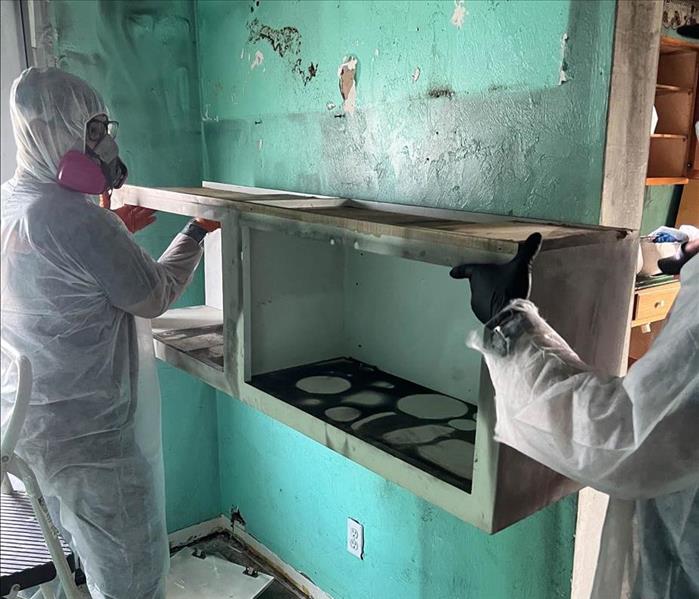
Preventing Mold in Drywall: Effective Strategies for a Mold-Free Environment
11/7/2023 (Permalink)
 Mold growth can be challenging without the proper repair methods.
Mold growth in drywall can compromise the structural integrity of buildings and impact their aesthetics. In this blog, we will explore how to identify mold in drywall and discuss effective repair methods. Understanding the signs of mold infestation and implementing proper remediation techniques can help homeowners and businesses maintain a safe and visually appealing environment.
Identifying Mold in Drywall
Detecting mold growth in drywall is crucial in addressing the issue promptly. Look for visual signs such as discolored patches, fuzzy or slimy textures, and a musty odor. Mold can thrive in areas with high humidity, water leaks, or poor ventilation. Pay particular attention to areas near plumbing fixtures, windows, and basements. Since mold can grow within the drywall as well, it may not always be visible on the surface. Conducting air quality tests by professionals can help determine the presence of hidden mold. Identifying mold in drywall early on can prevent further spread and damage.
Repairing Mold-Infested Drywall
Remedying mold-infested drywall requires a systematic approach. Begin by addressing any moisture sources or leaks to prevent future mold growth. Gather the necessary tools, including gloves, goggles, and a mask, to protect yourself during the repair process. Small areas of mold on drywall can be cleaned using an antimicrobial solution or a mixture of water and detergent. Scrub the affected area gently and allow it to dry thoroughly. If the mold has deeply penetrated the drywall or if the affected area is larger than approximately 10 square feet, it is advisable to seek professional assistance for proper removal and replacement of the affected drywall. Following the repair, ensure the area remains dry and properly ventilated to prevent future mold growth.
Preventative Measures
In addition to addressing mold growth in drywall, it is crucial to implement preventive measures to avoid future infestations. Ensuring proper ventilation in moisture-prone areas, such as bathrooms and kitchens, can help reduce humidity levels and discourage mold development. Regularly inspecting and maintaining plumbing systems, roof and window seals, and addressing any water leaks promptly can also prevent moisture accumulation within the drywall. Completing tasks such as sealing cracks and openings in the walls, using mold-resistant drywall or paints, and installing dehumidifiers in humid climates can further enhance mold prevention efforts. By taking these preventive measures, you can minimize the risk of mold growth in your drywall and create a healthier and more resilient living or working environment.
Mold growth in drywall can be a challenging issue, but with proper identification and repair methods, it can be effectively resolved. Being vigilant in detecting mold in drywall, addressing moisture sources promptly, and employing appropriate remediation techniques will help maintain the structural integrity and aesthetics of your living or working space.
Steps to Keep your Family Safe with an Emergency Plan
10/15/2023 (Permalink)
Water-related emergencies can happen unexpectedly and disrupt daily life. From floods and hurricanes to burst pipes and sewer backups, it’s essential to have a family emergency plan in place to respond effectively and ensure everyone's safety. In this blog post, we will guide you through the process of creating a family emergency plan specifically tailored to water-related incidents.
Step 1: Assess the Risks
Begin by assessing the potential water-related risks in your area. Consider both natural disasters like floods and storms, as well as man-made incidents such as burst pipes or water main breaks. Research local flood zones, drainage systems, and other factors that may increase the risk of water-related emergencies.
Step 2: Establish Communication Channels
Clear communication is vital during emergencies. Establish multiple communication channels that can be used when traditional methods fail. Make sure every family member knows how to communicate via phone calls, text messages, social media, or walkie-talkies. It's also helpful to have a designated out-of-area contact whom everyone can reach in case of separation.
Step 3: Create an Evacuation Plan
If your home is at risk of flooding or other water-related disasters, create an evacuation plan. Identify safe evacuation routes and secure an alternative place to stay, such as a relative's house or a community shelter. Ensure that all family members understand the plan and know where to meet in case of separation during an evacuation.
Step 4: Assemble an Emergency Supply Kit
Prepare a well-stocked emergency supply kit specifically tailored for water-related incidents. This kit should include essentials such as bottled water, non-perishable food items, first aid supplies, flashlights, batteries, important documents, and a portable radio. Consider adding water purification tablets or a portable water filter for instances where clean water is not readily available.
Step 5: Safeguard Your Home
Take preventive measures to safeguard your home against water-related emergencies. Install flood barriers or sandbags to protect against floodwaters, ensure proper drainage around your property, and maintain your plumbing system to prevent pipe bursts. It's also beneficial to familiarize yourself with the location of shut-off valves for gas, electricity, and water.
Step 6: Educate Your Family on Safety Procedures
Educate your family about safety procedures in water-related emergencies. Teach them how to turn off the main water supply, gas valves, and electricity in case of emergencies. Make sure they know basic water safety measures, such as not touching electrical appliances in wet areas and avoiding flood waters or contaminated water.
Step 7: Practice and Review the Plan
Regularly practice your family emergency plan to ensure everyone is familiar with their roles and responsibilities. Conduct drills for evacuation, communication, and utilizing emergency supplies. Review and update the plan regularly to account for any changes in family dynamics, contact information, or community resources.
Creating a family emergency plan for water-related incidents is a crucial step in safeguarding your family's well-being during unexpected emergencies. By following these steps - assessing risks, establishing communication channels, creating an evacuation plan, assembling an emergency supply kit, safeguarding your home, educating your family on safety procedures, and practicing the plan regularly - you can be better prepared to respond effectively to water-related emergencies and ensure the safety of your loved ones. Remember, staying informed, communicating clearly, and prioritizing safety are essential in times of crisis.
Cracks in the Foundation: How Storm Damage Can Impact Your Home's Structural Stability
9/28/2023 (Permalink)
 Storms can leave behind foundation problems.
Storms can bring significant damage to various parts of your home, including the foundation. While the focus is often on visible damage such as roof leaks and fallen trees, it's crucial to recognize the potential impact on your home's foundation. Understanding how storm damage can affect your foundation is essential for early detection and necessary repairs. In this blog post, we will explore the risks associated with storm damage and its effects on your home's foundation.
Soil Saturation
Heavy rainfall during storms can saturate the soil surrounding your foundation. When the soil becomes overly saturated, it expands and exerts pressure on the foundation walls. This pressure, known as hydrostatic pressure, can lead to cracks, bowing, or leaning walls. It's important to address any signs of foundation movement promptly to prevent further structural damage to your home.
Intense storms can cause erosion and soil shifting around your foundation. As rainwater rushes and flows, it can wash away soil from around the foundation, creating voids or gaps. These empty spaces weaken the foundation's support, potentially leading to settlement and uneven settling of your home. The shifting soil can also cause foundation cracks and compromises its stability.
Foundation Heaving
In regions where freezing temperatures occur during storms, foundation heaving can become a concern. When moisture in the soil freezes and expands, it exerts upward pressure on the foundation. This pressure can cause the foundation to rise or heave unevenly, leading to cracks and structural instability.
Storms can result in water infiltration into your home through foundation cracks, basement windows, or compromised waterproofing systems. If left unchecked, this water intrusion can cause extensive damage, including moisture-related issues such as mold growth, rot, and deterioration of building materials. Regularly inspecting your foundation for cracks and addressing any waterproofing concerns can help protect your home from water damage.
Compromised Drainage Systems
Storms can overwhelm your home's exterior drainage systems, such as gutters, downspouts, and perimeter drains. Improper drainage or clogged systems can lead to water pooling near the foundation. The prolonged presence of water can weaken the soil and contribute to foundation problems over time. Maintaining and ensuring the proper functioning of your drainage systems is essential to mitigate potential risks.
Tree Damage
Trees near your home can present a significant risk during storms. Strong winds can cause trees or large branches to fall onto your home, damaging the foundation and other structural components. Tree roots can also extend beneath your foundation, potentially causing damage and destabilizing the structure. Regular tree maintenance, including trimming and removal of hazardous trees, can help reduce the risk of foundation damage.
Understanding the potential impact of storm damage on your home's foundation is crucial for protecting your property's structural integrity. From soil saturation and erosion to foundation heaving and water infiltration, storms can pose various risks. Regular inspections, prompt repairs, and proactive maintenance are key to identifying and addressing foundation issues early on. By taking the necessary precautions and seeking professional assistance when needed, you can protect your home's foundation and ensure its long-term stability.


 24/7 Emergency Service